
Origami Cat Instructions PDF: A Comprehensive Guide
Discover the art of creating an origami cat with our PDF guide. Perfect for all skill levels, it includes easy-to-follow instructions, materials preparation, and step-by-step folding techniques. Start crafting your paper feline today!
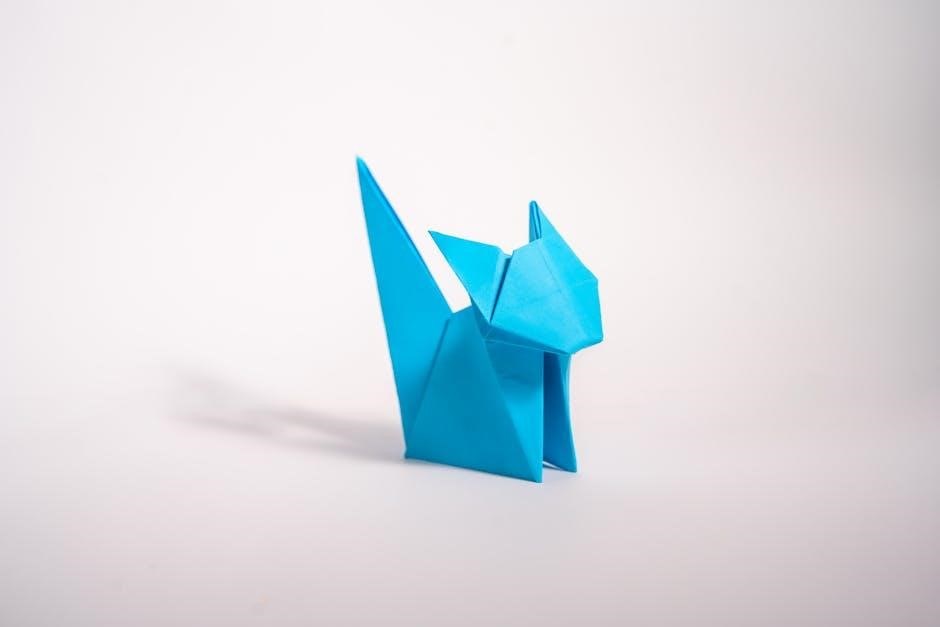
Origami cats are a delightful creation in the world of paper folding, offering a charming way to craft a cute feline using simple materials. With a square sheet of origami paper, typically 15.5 cm in size, you can begin by making initial folds to form the basic structure. Start by folding the paper in half vertically, creating a crease that will guide subsequent folds. This crease helps in shaping the cat’s body. Next, form a kite shape by folding the paper diagonally, which lays the foundation for the cat’s limbs and head. Folding up the top corner and flipping the paper over aids in achieving symmetry and balance. Reinforce the folds to ensure the cat lies flat, resulting in a well-shaped final product. Patience and practice will lead to a beautifully crafted origami cat, perfect for decoration or as a thoughtful gift. The process is both meditative and rewarding, allowing creativity to flourish with each fold.
History and Popularity of Origami Cats
Origami cats have a rich history rooted in traditional Japanese paper-folding art, with designs evolving over centuries. Their popularity soared as origami gained global recognition, captivating crafters of all ages. Simple yet charming, origami cats symbolize agility and grace, making them a favorite subject. The rise of instructional PDFs and online tutorials has further boosted their appeal, offering step-by-step guides for creators worldwide. Artists like Makoto Yamaguchi have contributed intricate designs, while simpler models remain accessible for beginners. The joy of crafting a paper cat lies in its meditative process and the satisfaction of seeing a flat sheet transform into a lifelike figure. Whether for decoration or as a gift, origami cats continue to inspire creativity and delight audiences, reflecting the timeless charm of this ancient art form.
Materials and Preparation
Use a square sheet of 15×15 cm origami paper, preferably with different colors on each side. Prepare a flat surface and optional tools like a bone folder for precise folds. Start crafting your origami cat with these essential materials and setup.
Paper Size and Type Recommendations
For an origami cat, a square sheet of paper is ideal; The recommended size is 15×15 cm, as it provides a manageable canvas while allowing for detailed folds. If using traditional origami paper, opt for sheets with distinct colors on each side to create a visually appealing contrast. For beginners, thicker paper or kami is suggested due to its durability and ease of handling. Advanced folders might prefer thinner washi for smoother creases. Avoid regular printing paper, as it lacks the necessary texture and may not hold folds well. Ensure the paper is square, as rectangular sheets will not yield the desired shape. Properly sized and high-quality paper is essential for achieving a well-crafted origami cat.

Understanding Color and Pattern Options
When creating an origami cat, the choice of paper color and pattern significantly impacts the final result. Traditional options include solid colors like white, black, or red, which provide a sleek, classic look. For a more vibrant appearance, opt for dual-sided paper with contrasting colors to create visual interest. Patterns such as polka dots or stripes can add a playful touch, while metallic or foil finishes offer a luxurious feel. The color you choose for the outer side will determine the cat’s primary appearance, so select a shade that aligns with your desired aesthetic. Experimenting with different combinations allows for a personalized and unique design. Remember, the paper’s color and pattern will influence the overall charm of your origami cat, making it a one-of-a-kind creation.
Step-by-Step Folding Guide
Master the origami cat with our detailed guide. Follow easy-to-understand steps, from basic folds to final adjustments, ensuring a precise and adorable paper feline. Start folding now!

Basic Folds and Initial Creases
Begin by creating essential folds that lay the foundation for your origami cat. Start with a square sheet of paper, folding it in half both vertically and horizontally to form sharp creases. These creases will guide your subsequent folds. Next, fold the paper diagonally from corner to corner to create a triangular shape, then unfold it to reveal the crease. This step helps in forming the cat’s body structure. Finally, fold the paper in half along the midline to create a smaller rectangle, ensuring the edges align perfectly. These initial folds are crucial for achieving symmetry and balance in your design. Take your time to ensure each crease is sharp and precise, as they will dictate the success of the following steps. Properly executed basic folds will make the rest of the process smoother and more enjoyable.
Forming the Cat’s Body and Limbs
Once the basic folds are in place, focus on shaping the cat’s body and limbs. Fold the paper in half to create a compact rectangular shape, ensuring the edges align neatly. This forms the core of the cat’s body. Next, fold the top corners inward to create triangular shapes, which will become the cat’s ears. For the limbs, fold small triangles from the bottom edges, making sure they are symmetrical and evenly spaced. These folds will form the legs and paws. Finally, create a gentle fold at the top to form the neck, ensuring the head is slightly elevated. Use valley folds to reinforce the shape and maintain balance. Adjust the folds carefully to ensure the body lies flat and the limbs are proportionate. This step requires precision to achieve a lifelike appearance. Take your time to ensure each fold is accurate and symmetrical.
Final Touches and Adjustments
The final step involves refining your origami cat to achieve a polished look. Gently adjust the folds to ensure the body lies flat and the limbs are evenly spaced. Reinforce any creases that may have loosened during the folding process. Pay special attention to the cat’s face, where you can fold small triangles to create ears or add subtle details like eyes using a marker. For a more lifelike appearance, lightly press the paws to create a gentle curve. If necessary, tweak the neck and head alignment to ensure balance. Finally, smooth out any wrinkles or uneven edges to give your cat a clean finish. This step requires patience but is crucial for a professional-looking result. Once complete, your origami cat is ready to display or share with others. Be proud of your accomplishment and enjoy your new paper companion!

Tips and Tricks
- Reinforce folds gently to avoid tearing the paper.
- Use both hands to push in valley folds for symmetry.
- Flip the paper occasionally to ensure even folding.
- Be patient and adjust creases as needed for a polished finish.
Common Mistakes to Avoid
When crafting an origami cat, several pitfalls can hinder your progress. One common error is not aligning edges properly, leading to asymmetry. Overlooking crease directions can also cause the model to malfunction. Additionally, applying too much pressure during folds may tear the paper. Forgetting to unfold and reinforce creases can result in a misshapen figure. Another mistake is rushing through steps, which often leads to inaccuracies. Ensure each fold is precise and that the paper lies flat before proceeding. Pay attention to valley and mountain folds, as mixing them up can distort the design. Lastly, neglecting to adjust folds as needed can prevent the cat from sitting upright. By being mindful of these errors, you can achieve a more polished and adorable origami cat.
With these detailed instructions, you now have everything needed to craft your own charming origami cat. Whether you’re a beginner or an experienced folder, this guide provides a clear path to success. Remember, patience and precision are key to achieving the best results. Once complete, your origami cat can be a delightful decoration or a thoughtful gift. Don’t hesitate to share your creation with friends and family, inspiring others to explore the art of origami. Happy folding!