
This guide provides step-by-step instructions for assembling the Whalen 3-in-1 TV Stand, ensuring a smooth and efficient assembly process for your versatile TV display solution.
Overview of the Product and Its Features
The Whalen 3-in-1 TV Stand is a versatile and innovative solution for displaying flat-screen TVs, offering three distinct configurations to suit various needs. Designed for compatibility with TVs up to 52 inches, this stand features a sturdy build and adjustable shelves for added storage. Its swivel mechanism allows for easy rotation, enhancing viewing angles. The stand is constructed from high-quality materials, ensuring durability and stability. With a modern design, it blends seamlessly into any home decor. The product’s dimensions are 50W x 20D x 23-55.75H inches, making it suitable for both small and large spaces. This TV stand is an excellent choice for those seeking a flexible and reliable display solution for their television.

Importance of Following the Assembly Instructions
Following the assembly instructions for the Whalen 3-in-1 TV Stand is crucial to ensure a safe, stable, and functional setup. Proper assembly prevents errors that could lead to uneven balancing, structural instability, or even damage to your TV. The instructions are designed to guide you through each step methodically, minimizing the risk of mistakes. By adhering to the provided guidelines, you can avoid potential hazards, such as wobbling or tipping, which might occur if the stand is not assembled correctly. Additionally, following the instructions helps preserve the product’s warranty and ensures optimal performance. Always double-check each step and verify that all parts are correctly aligned and securely fastened before moving on to the next phase of assembly.

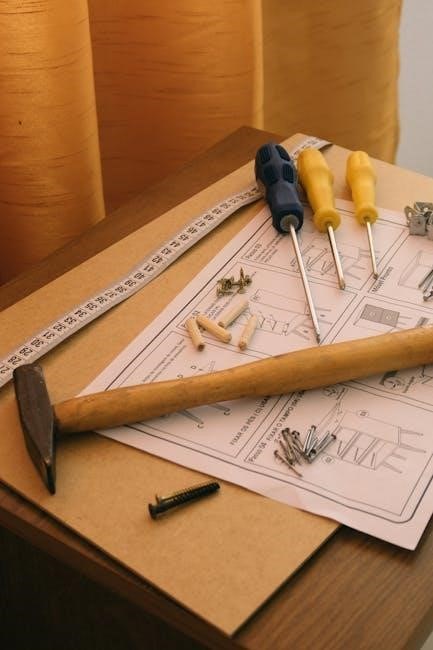
Tools and Parts Required for Assembly
The Whalen 3-in-1 TV Stand requires specific tools and parts for assembly, including bolts, washers, spacers, Allen wrench, screwdriver, and hardware listed in the manual.

Listing of Hardware and Components
- M4 x 12 mm bolts for top screw holes.
- M4 x 30 mm bolts for secure mounting.
- Washers and spacers for proper alignment.
- Lock nuts for added stability.
- Suction cups for leveling adjustments.
- Allen wrench for bolt tightening.
- Screwdriver for final adjustments.
Ensure all hardware and components are accounted for before starting assembly. Refer to the manual for specific part numbers and quantities.
Tools Needed for Successful Assembly
To ensure a smooth assembly process, gather the necessary tools beforehand. An Allen wrench (3mm and 5mm) is essential for tightening bolts. A flathead screwdriver will help with adjusting parts, while a Phillips-head screwdriver may be needed for certain components. Pliers can assist with gripping small hardware, and a rubber mallet can be useful for tapping parts into place without causing damage. Additionally, a level will help ensure the stand is properly aligned, and a measuring tape can aid in verifying dimensions. Having a socket wrench or adjustable wrench on hand can also be beneficial for securing larger bolts. Safety gloves are recommended to protect your hands during assembly. Ensure all tools are readily accessible to maintain efficiency and avoid delays.
Step-by-Step Assembly Process

Begin by assembling the base and frame, then attach the uprights and shelves. Next, install the TV mount and swivel mechanism, ensuring all parts are securely tightened and aligned properly for stability and functionality.
Assembling the Base and Frame
Start by carefully unpacking all components, including the side frames, bolts, washers, and spacers. Align the side frames according to the instructions and attach them using the provided M4 x 12 mm bolts. Ensure the frames are evenly spaced and properly aligned. Next, secure the base panel to the side frames using the M6 x 30 mm bolts, tightening firmly but avoiding overtightening. Use the Allen wrench to ensure all connections are snug. Finally, adjust the levelers on the base to ensure the structure is stable and even. Double-check the alignment before proceeding to the next step to ensure a solid foundation for the rest of the assembly.

Attaching the Uprights and Shelves
Once the base is assembled, attach the uprights to the side frames using the M6 x 30 mm bolts. Ensure they are evenly spaced and securely tightened. Next, place the shelves onto the uprights, aligning the pre-drilled holes. Use the cam locks or shelf pins provided to secure the shelves in place. Tighten all connections firmly to ensure stability. Finally, double-check the alignment and level of the shelves before proceeding to the next step. Properly attaching the uprights and shelves will provide a sturdy platform for your TV and additional components.
Installing the TV Mount and Swivel Mechanism
Attach the TV mount to the back of the television using the M4 or M6 bolts provided, ensuring they fit the TV’s mounting holes. Secure the swivel mechanism to the upright by aligning the pre-drilled holes and tightening the M8 bolts. Carefully hang the TV on the mount, ensuring it is evenly balanced. Adjust the swivel mechanism to achieve the desired viewing angle. Tighten all bolts firmly to prevent any movement. Double-check the TV’s stability and alignment before use. This step ensures your TV is securely mounted and allows for smooth swivel functionality, enhancing your viewing experience. Always follow the manufacturer’s guidelines for weight and size compatibility to maintain safety and structural integrity.
Final Assembly and Adjustments
Final assembly involves tightening all bolts securely, leveling the stand properly, and ensuring stability. Double-check all parts for a sturdy, balanced setup.
Tightening All Bolts and Securing the Structure
After completing the initial assembly, carefully inspect all bolts and screws to ensure they are properly aligned. Use a wrench or socket to tighten each bolt in a sequential manner, starting from the base and working upward. Pay special attention to the M4 and M6 bolts, as they are critical for stability. Avoid over-tightening, as this may damage the material. Double-check the swivel mechanism and shelf brackets to ensure they are securely fastened. For added safety, refer to the manual for torque specifications. Once all bolts are tightened, gently rock the structure to verify sturdiness; Finally, ensure the TV mount is level and the weight limit is not exceeded for optimal performance and safety.
Leveling the Stand for Stability
Place the stand on a flat surface and use a spirit level to ensure the base is even. Adjust the levelers on the side frames (A and B) by turning them clockwise or counterclockwise until the stand is perfectly level. Once leveled, tighten all bolts securely to maintain stability. Ensure the TV mount is also level to prevent any tilting. Double-check the weight limit and ensure the stand is not overloaded. Proper leveling is crucial for preventing wobbling and ensuring the structure remains stable. Refer to the manual for specific torque specifications if needed. This step ensures your Whalen 3-in-1 TV Stand is safely and securely assembled for optimal performance.
Tips for a Smooth Assembly Experience
Read instructions thoroughly, organize parts, and use 3D interactive guides. Work with a partner and take your time to avoid errors and ensure a successful assembly.

Common Mistakes to Avoid

When assembling the Whalen 3-in-1 TV Stand, avoid common mistakes like not reading instructions thoroughly, misidentifying hardware, or skipping the leveling step. Over-tightening bolts can damage parts, while under-tightening may lead to instability. Ensure all components are aligned correctly before securing them. Misplacing washers or spacers can result in loose connections. Do not attach the TV mount before fully assembling the stand. Ignoring weight limits can compromise safety. Double-check each step to prevent errors and ensure a sturdy, level, and secure structure. Taking shortcuts may save time but risks the stability and functionality of the stand. Proper assembly ensures optimal performance and longevity of your Whalen 3-in-1 TV Stand.
Recommended Assembly Time and Number of People Needed
The Whalen 3-in-1 TV Stand assembly typically requires approximately 2 hours to complete, depending on your familiarity with DIY projects. It is recommended to have two people assist, as this will make handling larger components and ensuring stability easier. While one person can manage the assembly, having an extra pair of hands can prevent mistakes and speed up the process. Plan accordingly and allocate sufficient time to avoid rushing, as this could lead to errors. Gather all tools and parts beforehand to streamline the assembly. With proper preparation and teamwork, you can efficiently and safely assemble your Whalen 3-in-1 TV Stand.